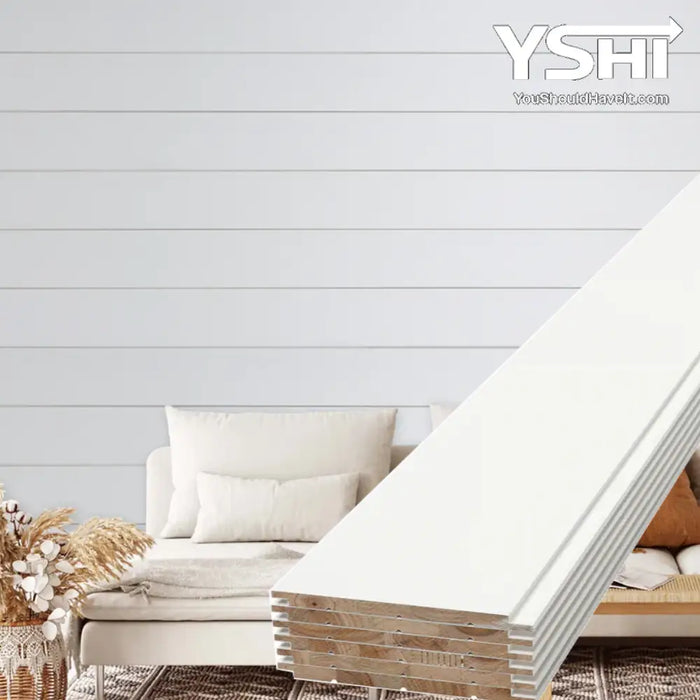
White Shiplap Siding Boards for Interior and Exterior Walls
Classic Shiplap Profile. Primed White Pine. Interior and Exterior Use.
Bring the timeless appeal of shiplap to any wall with our White Shiplap Siding Boards. Crafted from solid pine and finished with a crisp white primer coat, these boards deliver the clean, horizontal lines that define farmhouse, coastal, cottage, and contemporary interiors. The interlocking shiplap profile creates tight, seamless rows with a subtle shadow line between each board — the classic look that has been a staple of American architecture for over a century. The primed finish means the boards are ready to install as-is for a bright white wall, or paint them any color to match your design. Suitable for walls, ceilings, and exterior facades — for exterior use, a UV/weather-resistant polyurethane sealer is recommended.
Available in 94" length with 6 boards per box covering 21.05 sq ft. Install with adhesive, nails, or screws.
Key Features
- Classic shiplap profile — interlocking boards with clean horizontal shadow lines
- Primed white pine — bright, crisp finish ready to install or paint any color
- Solid pine wood construction — stable, lightweight, easy to cut and work with
- Interior and exterior use (UV/weather-resistant polyurethane sealer recommended for exterior)
- Install with adhesive, nails, or screws
- 94" length, 5.375" wide, 0.6" thick
- 6 boards per box, 21.05 sq ft coverage
- Install horizontally or vertically on walls and ceilings
- Cut to fit with a miter saw, circular saw, or jigsaw
- Suitable for residential and commercial applications
- Ships from San Diego, CA
Why White Shiplap
Shiplap is one of the most versatile wall treatments available — it works in farmhouse kitchens, coastal bedrooms, modern bathrooms, covered porches, and commercial interiors alike. The horizontal lines make rooms feel wider, and the subtle shadow between each board adds depth without visual noise. White is the natural choice for shiplap: it amplifies natural light, pairs with virtually any furniture and flooring, and creates the clean, bright backdrop that makes the board profile pop. The primed finish is a practical advantage too. Install and leave it white, or apply any paint over the primed surface for a custom color — the primer coat ensures paint adhesion and consistent results without extra surface prep. At 6 boards per box covering over 21 sq ft, it is also an efficient choice for large walls and full-room installations.
- Living rooms and feature walls — classic shiplap backdrop with farmhouse warmth
- Bedrooms — clean, bright accent wall behind a headboard
- Kitchens and dining rooms — cottage charm that works with any cabinet color
- Bathrooms — coastal, spa-like freshness (seal for moisture-prone areas)
- Covered porches and outdoor spaces — exterior-rated with polyurethane sealer
- Ceilings — coffered or straight-run shiplap ceiling for added character
- Commercial interiors — retail, hospitality, and office spaces with farmhouse or coastal design themes
Product Specifications
| Specification |
Details |
| Material |
Solid Pine Wood |
| Finish |
Primed White — ready to install or paint any color |
| Board Width |
5.375" |
| Board Thickness |
0.6" |
| Profile |
Shiplap (interlocking rabbet joint) |
| Application |
Interior and Exterior (UV/weather-resistant polyurethane sealer recommended for exterior) |
| Installation |
Construction adhesive, nails, or screws |
| Ships From |
San Diego, CA |
Box Options
| Option |
94" Length |
| Boards per Box |
6 boards |
| Coverage per Box |
21.05 sq ft |
| End Cap Included |
No |
| Minimum Order |
No minimum |
Coverage Calculator
94" Length (21.05 sq ft per box)
| Area to Cover |
Boxes Needed |
Notes |
| 50 sq ft |
~3 boxes |
Add 10% for cuts and waste |
| 100 sq ft |
~6 boxes |
Add 10% for cuts and waste |
| 200 sq ft |
~11 boxes |
Add 10% for cuts and waste |
| 300 sq ft |
~16 boxes |
Add 10% for cuts and waste |
How to Install White Shiplap Siding Boards
Installation is straightforward and can be completed by most DIY homeowners and contractors in a few hours. For exterior applications, apply sealer before installation.
Step 1: Prepare the Surface
The wall must be clean, dry, and structurally sound. For interior walls, fill any holes or cracks and let patched areas dry fully. For exterior installations, ensure proper moisture barriers and framing are in place before beginning.
Step 2: Apply Sealer (Exterior Use)
For exterior installations, apply a UV/weather-resistant polyurethane sealer to all surfaces of each board — face, back, and edges — before mounting. Allow to fully cure per the sealer manufacturer's instructions. This step protects the primed wood from moisture, UV, and weathering.
Step 3: Measure and Plan Layout
Measure the wall area to calculate how many boxes you need, adding 10% for cuts and waste. Mark a level starting line at the bottom of the installation area to keep all rows level from the first board up.
Step 4: Dry Fit
Before fastening, lay out the boards against the wall to confirm your layout and identify where cuts are needed. This is especially important around windows, doors, outlets, and corners.
Step 5: Install the First Row
Start at the bottom with the rabbet groove facing up. Apply construction adhesive to the back, or fasten with nails or screws into wall studs. Use a level to confirm the first row is perfectly level — all subsequent rows depend on it.
Step 6: Continue Row by Row
Slide each subsequent board's tongue into the groove of the board below, creating the interlocking shiplap joint. Fasten each row, checking level periodically as you work up the wall. The shiplap joint creates a tight fit with a consistent shadow line between boards.
Step 7: Cut to Fit
At wall edges, corners, windows, doors, and outlets, trim boards with a miter saw, circular saw, or jigsaw. For exterior installations, seal all cut edges with polyurethane before mounting.
Step 8: Paint or Finish (Optional)
The primed surface is ready to paint any color. Apply your chosen topcoat after installation for the cleanest results, touching up any nail holes or fastener heads before painting. Or leave as-is for a crisp white finish — the primer coat is complete coverage.
Why YouShouldHaveIt
- Ships from San Diego, CA warehouse
- In-stock — same or next business day shipping
- Volume discounts automatically applied at checkout
- Expert team: (858) 261-4068, Mon–Fri 8am–4pm
- Retail showroom in Santee, CA — see the panels in person before you buy
Frequently Asked Questions
Q: What is shiplap?
A: Shiplap is a type of wooden board milled with a rabbet (notch) cut into the top and bottom edges. The boards interlock with each other — each board's groove fits over the board below — creating tight, seamless rows with a consistent shadow line between each course. It was originally used as exterior siding and has become one of the most popular interior wall treatments for farmhouse, coastal, and contemporary designs.
Q: Is this primed or painted?
A: These boards arrive with a white primer coat applied. The primer provides a solid white finish that is ready to install as-is, or it creates the perfect base for any topcoat paint color you choose. No additional priming is needed before painting.
Q: Can these be used on exterior walls?
A: Yes — these boards are suitable for interior and exterior use. For exterior applications, apply a UV/weather-resistant polyurethane sealer to all surfaces including edges before installation. This protects the primed pine from extended outdoor moisture and UV exposure.
Q: How is shiplap installed?
A: These boards can be installed with construction adhesive, nails, or screws. For most interior walls, face-nailing into studs is the most secure method. For exterior use, exterior-grade fasteners are required to prevent rust staining through the painted surface.
Q: Can these be painted?
A: Yes — the primed surface accepts any water-based or oil-based paint. Apply your topcoat after installation for the cleanest finish. The primer coat provides excellent adhesion for any color.
Q: Can these be installed on ceilings?
A: Yes. Fasten with screws directly into ceiling joists for a secure overhead installation. A shiplap ceiling adds striking character to any room.
Q: Do these panels help with sound?
A: These are cladding boards, not acoustic panels. The wood surface helps diffuse sound reflections compared to a flat hard wall. For dedicated acoustic performance, see our Acoustic Wall Panel collection.
Q: Is free shipping included?
A: Yes — free shipping within the contiguous United States.
Q: Do you have a showroom?
A: Yes — 10926 Woodside Ave Suite A, Santee, CA 92071. Monday–Friday, 8am–4pm.
Explore More Products
Discover more premium home improvement solutions designed for durability, style, and performance.